Platinum Do’s and Don’ts For Wax Model Preparation
February 27, 2024
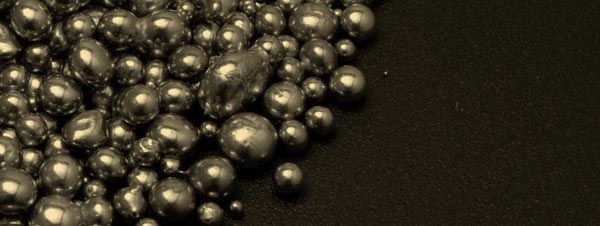
In order to help you get the best possible platinum casting from Au, we have prepared the following list of suggestions to help you with the mold making process and to prepare the wax for casting:
- If you are using any wax cleaner or polishing solution consider eliminating it from your routine. The residual solution remaining on the wax can cause investment breakdown and consequently yield a very poor casting. It is very difficult for us to tell if these solutions have been used on the wax. If you do use it, clean the wax extremely well with soap and water. The use of these cleaners is even more detrimental if the piece is going to be cast in gold.
Another concern is that of silver/aluminum paint on the wax that allows the customer to see approximately what the finished piece will look like. This application must be completely cleaned off of the wax prior to investing. Residual amounts of this paint will cause casting difficulties as well as excessive finishing labor. We do not invest waxes with the paint remaining on them.
- As pieces increase in weight, they become more difficult to cast. This is due to the mass of material and the attendant shrinkage that has to be fed during the very short solidifications window. A few things to consider would be to relieve areas under very heavy shoulders and don’t assume that the same designs you’ve been using for gold will work equally well for platinum. In many cases the thick-to-thin designs cannot be successfully cast without the addition of more and larger gates to minimize shrinkage porosity. In some cases the pieces should be redesigned into smaller parts to avoid these problems and appropriately meet the manufacturing challenges. Component pieces would necessarily have to be soldered into the finished piece after casting.
A similar situation exists with large thin pieces, only in this case the piece becomes more difficult to fill because of both the short liquid window of the metal and the added length of a very thin cavity. Although each piece requires an evaluation on its own characteristics, as a general rule, these pieces should be fabricated.
- If possible, fill as many holes as you can. Some pieces have holes drilled for channel set and burnished in diamonds. These leave a column or other similar shaped quantity of investment in the cavity that will be the finished piece once the platinum is cast. Because of the mass and density of this metal, it tends to break these “columns” free and in so doing, it causes them to flow to some other location inside the mold pattern. They cannot escape, because the cavity is a closed system. Therefore, the small pieces of investment that are broken away, when the superheated metal is thrown, with very high force, into the cavity can cause “pits” in the finished piece. These pits must either be burnished away or platinum must be fused into them. This requires additional work and cost to be incurred. This, of course, is not only caused by holes, it can be any fine detail that is delicate enough to be broken away when the casting is done. These designs should be given close attention when the piece is being created to avoid post casting and finishing difficulties.
Although not as obvious, when two or more pieces, such as when a machined wax bezel is joined to a carved ring shank, these is almost always a thin space somewhere in the joint that does not get filled and consequently will form a shelf of sorts when invested. This shelf (or whatever form it takes on) will always be very thin and subject to the same forces of the superheated platinum, when cast. Again, the results are the same; free investment in a closed system that will surely result in pits due to the trapped pieces. The guideline here is to seal all joints that are created when two or more pieces of wax model are joined prior to casting or alternatively, to do this after casting and finishing with some sort of metallurgical bond.
- Don’t be tempted to sprue the piece yourself. We take the design into account in a technical fashion and place the gates in relation to the mass and shape of the piece.
- If you have a mold, send it along with the order. If that is not possible, send more than one injection. This is an additional precaution to ensure timely completion of your order. With all of the technology we employ to assure you of high quality castings, there is always the possibility of something that Murphy has a hand in. If we claimed to be perfect, then you would have something to be concerned about.
Make sure to check out our Jewelry Casting section for more information about our casting services. If you have any questions concerning the above suggestions, or we can help you with any piece, please contact us. We will be happy to assist you.
Other Articles
Co-casting , also known as bi-metal casting, is a terrific technique that can potentially yield quite amazing results for both you and your customer. We are seeing more and more platinum 18 karat gold combination in both men’s and women’s jewelry. In most cases two or more pieces are cast separately and then soldered together to attain the bi-metal look. By necessity, these designs have to be relatively straightforward and they must lend themselves easily to all subsequent assembly operations. By comparison Co-Casting can be a viable alternative that can be used to achieve much more complex, interesting and even hard-to-believe designs. This technique requires that you prepare the wax for the platinum portion of the design, have it cast and then completely finish the platinum casting. Subsequently, the wax for the 18-karat portion is added directly to the finished platinum casting. You may need to add an anchor or two and the design will dictate just how you are going to secure the 18-karat to the platinum. In some cases, because of the complexity of the design, no anchors will be necessary at all. Also, you need to make the wax just a little bit higher than the platinum everywhere. This is to account for the small amount of shrinkage that will take place as well as the polishing that will have to be done to the gold. When considering the overall design you can get as complicated as your imagination will carry you. Undercuts and interlocking designs are no longer a problem, as you will be working in wax and there will be no need for complex or impossible metal-to-metal assembly operations. The wax is completed just as you would any other model, except it is now an integral part of the finished platinum casting. We will add appropriate gates and cast the piece as usual. The casting of the 18-karat will actually form a metallurgical bond at the grain level and no further mechanical assembly will be required. Platinum iridium alloys are recommended for this process as they do not oxidize. Only the 18-karat will require finishing subsequent to casting. The finishing is further enhanced in that the platinum is harder than the gold. Some care needs to be exercised, however, to prevent a “step” at the junction of the two metals because of aggressive polishing. This is precisely the reason for making the wax just a touch higher than the platinum. When finished with this technique, the two surfaces will be at the same height. There are only a few guidelines that require your attention when considering this approach as follows: A non-oxidizing platinum alloy needs to be used because you want to avoid having to polish the platinum after the gold has been cast unto it. If the platinum piece is relatively smooth or has no irregular shape to anchor the gold, an anchor (hidden in the case of anchoring the gold to the platinum) may have to be added to the platinum to prevent the piece from moving during the burnout cycle as well as casting. If you give this point some thought it will be obvious as to what will be necessary. We can also assist you in this matter. Some preliminary consideration should be given to the overall design in terms of it’s ability to produce a successful casting. For instance, the gold should not take on the form of a fine wire or long thin piece. These forms should be fabricated. Another consideration is to avoid any space that remains between the platinum and the wax. Here the possibility exists that a thing “wall or sliver” of investment is formed. When the molten 18-karat is delivered into the mold, these very thin portions almost always will be broken off and will result in pits in the gold—remember, the mold is a closed system and the loose investment has nowhere to go. This situation is also present when an attempt is made to fit a platinum piece to some unsuitable injections where the fit is not complicated piece with hard to reach areas. These pieces will almost always present finishing difficulties either from loose investment or excessive gold being cast over the platinum’s surface. With some careful attention to the details and a little experience, you can create some really amazing pieces!
Platinum Durability and Scratching One of the most frequently asked questions about Platinum concerns scratching. It seems that the consumer equates durability with scratch resistance and is then disappointed when Platinum jewelry scratches and show signs of wear. Let me say that all metal scratches. From the finest steel to the finest Platinum, no metal is immune to scratching. When two materials come into contact, the harder one will always prevail. Whether you use a kitchen utensil or a wrench while wearing a platinum ring, a scratch will result if contact is made. The same is true for door hardware, garden tools and any other item that is harder than Platinum. Since these are the objects that we come into contact with each day and impart scratches, the Platinum will develop a patina-like appearance that will last. This is also the reason why many designers prefer satin finishes, brushed and sand-blasted finishes over the bright polished look. There are, however different alloys that have a different hardness and thus a greater scratch resistance. This does not mean that any of the alloys are completely impervious to scratching, it only means that some alloys have somewhat more resistance to scratching. Another point to keep in mind is that there is a difference between strength and durability. Strength is measured in pounds per square inch (PSI) and scratch resistance is determined by hardness. The following is a comparison of some Platinum alloys:
Finishing platinum is really no more difficult than finishing any other precious metal. It is, however, quite different. With a little practice and a proper understanding of the procedures and materials, a very fine finish and a histrous polish can be achieved. This will take time, effort, technique and the right polishing materials. When we talk about the jewelry finishing and polishing process, we are discussing the reduction of scratches and the removal of small pits and other blemishes on the surface of the metal. A finish is defined as the surface treatment that will alter the appearance of a cast product. A finish is defined as the surface treatment that will alter the appearance of a cast product, with techniques such as Florentine, matte, brushed or hammered or otherwise textured in some fashion. Polishing, on the other hand, creates the mirror-like luster on the metal’s surface. Until the decision is made to either apply a mechanical finish or a high luster, all the initial steps of preparation are the same. Platinum’s density and scratch resistance require a succession of finer and finer abrasives to reduce the scratches until they are microscopically small, thus presenting a high polish to the eye – a luster that will outlast any other shine. The surface should be mirror-like, without any blemishes or waves. There should be no visible porosity. After the removal of the sprue or after a repair is completed, use minimum filing to create a smooth surface. Just remove the high spots with a file. Be sure the file is cutting forward strokes and is not dragging across the platinum on the return stroke. This technique will prevent smearing as well as clogging the file. If porosity is encountered, a highly polished tungsten burnisher should be used to burnish the porosity away. A small amount of lubricating oil, such as oil of wintergreen may be used to facilitate the burnishing. The burnishing will work harden the surface of the casting, this will make it somewhat easier to hold a high polish. In some cases it may be necessary actually fill porosity by fusing small amounts of metal into the affected area(s). The metal used in this operation can come from the small sprue that is removed in the early finishing. Use progressively finer abrasives, such as silicon grade carbide or alumina papers on a sand paper stick. Grits 220, 280 and 320 are most commonly used. Unitized wheels in grits 400, 500 and 600 can be used to create even finer scratches. Sand papers are also available in those grits. As you switch from one grade to the next, sand at 90 degrees to the previous direction, removing all scratches from the previous grade. To prevent cross-contamination from gold or other metals, segregate all abrasives for platinum use only and keep them, as well as other tools in a separate location. There are some new tools on the market where ceramic particles are bonded and mixed with a rubber carrier material. The ceramic surface is quick to cut without clogging. The different grits are quickly identified by color coding. Red and blue are coarse, #80 and #120, green and purple are medium, #220 and #320, and orange is a fine grit at #500. They are mounted on 3/32 shanks for flex shaft motors and can be run up to 30,000 rpm. After all of the surfaces have been prepared to a uniform 600 finish, with crisp edges, the actual polishing process can begin. Using a hard felt wheel, charged with a polishing compound, a progressively finer scratch can be obtained. There are many compounds that will accomplish this job, however we recommend the compounds supplied by Gesswein. The gray 800 grit compound, followed by the white 1500 grit, then the white 8000 grit is a way to create a terrific polish on platinum. The final luster can be achieved using the carrot or orange rouge compound. It is important not to cross-contaminate individual wheels and to clean the jewelry piece prior to using the next finer compound. In other words, if a wheel is used for 8000 white compound, do not use it for any other compound or for anything other than platinum jewelry. It is helpful to polish individual components prior to assembly, while they are easily accessible to the polishing wheel. It is especially important to pre-polish the platinum if gold pieces are to be joined to the platinum. This is because it takes more steps to polish platinum and one would tend to over-polish the gold. Because platinum does not oxidize during the fusing/welding process, the finish will not be altered at assembly. A firecoat of boric acid and denatured alcohol is recommended to protect the gold components from oxidation. If you follow these instructions, polishing platinum will not be that complicated. All of these steps will become second nature and the results will be a luster that can only be achieved by platinum. Make sure to check out our Jewelry Casting section for more information about our casting services. If you have any questions concerning the above suggestions, or we can help you with any piece, please contact us. We will be happy to assist you.
Platinum will combine with most molten metals. While this is useful for making alloys, it can also cause you a lot of trouble. As an example, small amounts of cadmium, lead, tin or aluminum can cause intergrannular cracking when combined with platinum. This same situation can also be caused in a reducing flame during melting, annealing or joining and liberating aluminum or silicon from refractory materials. This occurs under reducing conditions when the platinum alloy is in close contact with the support and well above red heat. Accordingly, a charcoal block would be out of the question when working with platinum. Acetylene gas should also be eliminated from any work with platinum, unless the torch is screaming, due to the fact that hydrocarbons are being emitted from the flame. Hydrocarbons in general, such as oil ad grease are typical contaminations. It is important to avoid trapping any potential contaminant in any metal working process such as rolling, drawing, hammering, cutting or abrading. If contamination has occurred after heating, it is “very” difficult to correct other than cutting the contaminated material out and repairing by joining in a new piece of clean alloy. In the worst case, starting over may be the only alternative. Attempts to solder intercrystalline cracking due to contamination usually results in spreading the problem. This is most common when joining gold to platinum with solders containing cadmium or when acetylene is used. The following list highlights some possible causes of contamination that should be avoided: Lead-tin and gold solders containing cadmium on the same bench. Charcoal soldering blocks. Acetylene gas used for joining. Abrasives rolled into the surface of platinum. Filings from other precious or non-precious metals. Filings or drillings from gemstones or mineral crystals. Oils, greases or soaps used for drawing, rolling, etc. Machining suds (lubricants). Reducing flames and furnace atmospheres. In general, good housekeeping will pay big dividends when working with platinum. Make sure to check out our Jewelry Casting section for more information about our casting services. If you have any questions concerning the above suggestions, or we can help you with any piece, please contact us . We will be happy to assist you.